Archive
He’s Got the Moves

I made some bibs for our friends Lisa and David’s twins Weston and Brennan. I think you can see that Weston, on the left, might have the size advantage, but Brennan has the moves!
Inspired by Mason Dixon Knitting, and Barbara Walker , and my own free pattern; these boys are well covered for now!
Koah’s Bibs

Woke up on a Sunday morning to an email from friends Stephanie and Dan that now they are 5! Koah joined his 2 brothers Northern and Denver on May 26th! What a surprise!
Hey Steph and Dan, what’s going on there in Copenhagen?
For fun, I adapted the log cabin pattern from Mason-Dixon Knitting to bib proportions. I used a technique from Lucy Neatby’s – Knitting Gems 4,
to make a nice selvage edge on the garter stitch side which made it easy to pick-up the stitches when I made the turn for the log cabin strips.
All in all, lots of fun with color, and lots of ends to weave in.


Beanie Babe
This is the first in a series of Beanie posts.
Noro Kureyon Beanie. Takes one skein. Knit in the round.
Get your gauge, then cast on the number of stitches based on your head circumference (make the number divisible by 8, more on that later) and how you want the hat to fit. If you want it tight fitting, subtract an inch. If you like it loose fitting, do not subtract.
Garter edge for 1 1/2 inches then stockinette stitch for the desired length (depends on your head size and how you like to wear your beanie: high on your forehead or low near your eyebrows. Measure a hat that you like the fit.)
Note: Garter stitch in the round is: knit a row, purl a row. Repeat these 2 rows for a garter "ridge" or 2 garter stitch rows. Be sure to mark the beginning or end of the round so you know where to change from knit to purl.

When it is time to begin the crown decrease, divide the total number of stitches by 8, (you will have 8 sections) then knit to the last 2 stitches in each section and knit 2 together. (k2 tog) for the entire round.
Knit the next round, no decreases.
Repeat these 2 rounds until you have 8 stitches remaining. Try the hat on to see if it fits. If so, cut the yarn, leaving about a 6" tail.
Thread a tapestry needle and thread the yarn through the open 8 loops. Pull tight to close hole. Weave in all ends, block as appropriate for your yarn, and enjoy! this website explains it really well.
Velvet Rabbit: The White Album
My version. A gift for a friend who made my shoulder better.

The view from the back.

Separates

This adorable bunny

(photo from the book)
from Simple Knits for Little Cherubs called the "Velvet Rabbit", by Erika Knight. The bunny pattern was pretty straightforward. All garter stitch. I knit both front and back pieces at the same time to ensure that they were the same size. Same strategy as for sweater sleeves. Also, when you are done, you are done, except for the arms, which are very quick. The ear shaping works quite well.
The instructions for sewing up the bunny don’t seem (no pun intended) as if they will work, but follow them and they do! I’m making another one in Cascade Ecological Wool (a gift for the son of one of my knitting friends).. This one was made using Cascade 220 Superwash since the recipients were busy parents.
Note: The pattern calls for Rowan Fine Chenille, which appears to be somewhere between fingering and DK weight yarn, using needles that are several sizes smaller than normally used for the yarn, (pattern calls for a US 1 needle, yarn recommends US 2-5 needles). So, where I am going with this is: Whatever yarn you choose to make this adorable bunny out of, go down several needle sizes from the recommended needle for the yarn. What this produces is a fabric that is denser and more "velvet-y" (especially if you are using a chenille yarn or cotton yarn), it keeps the stuffing from showing through and helps keep the garter stitch from stretching too much.
Enough said.
And of course, this bib (free pattern)

before photos on the "board". Blocking makes a big difference when you are sewing together pieces that are supposed to be the same size. I bought this one
and it makes all the difference. It folds in half for easy storage and well, you can read about on Webs. Enjoy.

Bib Caterpillar
Put them together and you get:


A caterpillar of bibs.

Made for my friends David and Lisa’s new twin boys from various yarns and patterns using my Button Knot Bib Pattern as a template. Some Fibonacci striping (bottom row on the left) going on and a Barbara Walker "String of Purls" pattern (middle row on the left) from A Second Treasury of Knitting Patterns. You will recognize the first two patterns from Mason-Dixon Knitting: The Curious Knitters’ Guide: Stories, Patterns, Advice, Opinions, Questions, Answers, Jokes, and Pictures.
Macaw Socks
First sock! I love the yarn.

This yarn… (click to see details)

I didn’t come to this lightly. I read Knitting Rules!. I watched, Knitting Sock Techniques 1, Lucy Neatby a Knitter’s Companion. Then I watched Knitting Sock Techniques 2, Lucy Neatby a Knitter’s Companion!
It was a cold and rainy afternoon with the fireplace cranked up and a husband working in the other room. (These videos are really good). Lucy Neatby has so many good ideas, tips, techniques, and the video is clear and easy to follow. Watching her use those blunt birch needles (I am a devotee to Knitpicks’ very pointy needles) was something else. And besides, anyone with raspberry and blue hair can’t be anything but GOOD!
It’s amazing how much fun it is to watch someone else knit!! I think my husband thought I was watching grass grow but it reminded me of watching cooking shows ;-D.
I also read Getting Started Knitting Socks, Socks Soar on Two Circular Needles, Socks 101, knitty’s tutorial socks101, and looked at lots of sock patterns.
I purchased the needles, I purchased the yarn, but I just couldn’t get started. Finally I started doing gauge swatches and that took an number of tries (this poor yarn probably got knitted 10 or 15 times before I was satisfied). And then I realized that I didn’t know how to do the long tail cast on (a-r-r-g-g-h) so I had to find a website with a video to show me how to do THAT!!
This one worked for me: http://www.knittingatknoon.com/longtail.html
So, after much reading and thinking and fiddling, I decided to stick with the basics and used Knitting Rules! (Stephanie Pearl-McPhee, the Yarn Harlot) basic sock pattern and the fun began…
Solstice Stocking
I am thinking of starting a new tradition: the Solstice Stocking. For those of us in the Northern Hemisphere (especially here at the 47th parallel), we celebrate the winter solstice or midwinter. Midwinter is the day when we have the shortest number of daylight hours, but after that, the days start to get longer . I think we all need a stocking filled with goodies to celebrate the returning of the LIGHT!!! All in the Southern Hemisphere, how about a Summer Solstice Stocking?
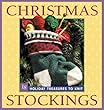
Why a stocking, you say? Especially a striped one? Well, another tradition that goes along with this Solstice Stocking could be stash busting! Check out this fabulous looking example my friend Michelle made for her son, Grant, from pieces of Cascade 220 , Cascade Pastaza, and other mystery yarn from her stash and a pattern from the book, Christmas Stockings.

She brought this to our knitting group the other evening and we all went crazy. We couldn’t take our hands off it. It’s big enough to get your hand inside of it (!) and long enough but not tooooo long. Just right.
And, since I (and several others in our group) have yet to knit a sock (!!!) what a great way to learn sock basics than on a really big sock, that doesn’t have to fit and is going to be felted so that any minor mistakes will be somewhat obliterated!
A couple of interesting items to note:
-
Michelle tells me she knit all the stripes the same width/same number of rows.
-
As you can see, they didn’t felt the same. Which, actually, I think, adds to the visual interest of the stocking. If (no WHEN) I make my stocking, and if I use all the same yarn, I will vary the widths of the stripes so that the end result is like Michelle’s.
-
Shaving the finished product made a huge difference in the look. The consensus among the group (and most importantly, from Grant’s point of view) was the shaved look was superior to the fuzzy look. Here are the two sides, you decide.


-
The Wonder Washer. I just recently read about this product on Craft Gossip, a new site for me. I will be checking this site out for tips. Back to the Wonder Washer, it looks like it might be a good solution for those of us with front loaders that take forever to felt items.


He’s playing soccer now, but come December 21st, he will be looking in his stocking to see what the Solstice has brought him.


Embellish Knit Video Tutorial: Part One and Two
Tutorial: Part One Tutorial: Part Two
This video tutorial is for the Bond Embellish-Knit!. and Magicord knitting machine.
Here is the approximate text of the videos:
This is a tutorial on how to use either the Bond Magicord or the Bond Embellish-Knit!. spool knitting machine. Both machines will produce a very nice, even 4 stitch i-cord of any length that can be used in a variety of ways. The i-cord straps for my FREE Bib Pattern, were made using the Embellish-Knit!
I have the Embellish-Knit!. so that is the machine I will use.
There are 3 items in the package:
1. the machine
2. the clamp or the weight
3. the needle or threader
You are given some practice yarn in the package and I encourage you to use that yarn for practicing since it is in a gauge of yarn that will work in the machine. For the demonstration, I am going to use a sport weight cotton yarn.
One note about this machine is that bulky yarns will not work in it and they say worsted yarn will not work in it, but I am able to make Cascade 220 work in it and I understand that Harrisville Shetland Wool works in it. More about that later.
Before we start, I suggest you sit at a table and have a pillow or a folded blanket positioned near your feet. Toward the end of the demonstration, all will be revealed!
Now on to the demonstration
Before we begin, notice that you have 4 hooks in the center of the machine.
Now, turn the crank. Be certain to turn the crank only in the direction indicated by the arrow on the machine. Notice that the hooks rotate up and down as you turn the crank. Notice that there are little latches on each hook. More on this later.
The first thing you do is thread the machine. You do this by putting the thread through the hole at the bottom and then through the notch at the top and then drop it down the center. You can use the needle provided in the package if you like to make it easier.
Or, you can use any tapestry needle that you have to do the same. Or you can just do it with your fingers.
Once you have the yarn coming out of the bottom of the machine, clamp the weight to the end of the thread. Hold on to the clamp or the weight of it will pull your yarn right through the machine. Like This!!
Make certain that your yarn is to the left of the machine and is "free flowing", or has NO tension on the yarn. If there is tension on the yarn, or if it is not feeding from the left, the machine will jam. Trust me on this…
SLOWLY begin turning the crank on the machine in the direction indicated. At this point, you will have to hold the yarn (providing some tension on the yarn, just when I told you not to have tension on the yarn) with your left hand to keep it from falling through the machine but later, you will not.
(You will get to turn the crank more speedily later, but for now SLOWLY)
As the yarn passes the 1st hook, make certain it CATCHES in the hook, with the latch down.
As the yarn passes, the 2nd hook, make certain it SKIPS the hook. You may have to assist the yarn, either with your finger, the needle, or a crochet hook. Whatever works for you.
As the yarn passes the 3rd hook, make certain it CATCHES in the hook, with the latch down.
As the yarn passes, the 4th hook, make certain it SKIPS the hook. You may have to assist the yarn, either with your finger, the needle, or a crochet hook. Whatever works for you.
To recap, on the first round, the 1st and 3rd hooks, CATCH the yarn, the 2nd and 4th hooks SKIP or pass over the yarn.
SECOND ROUND.
OK, so now you are ready for the second round.
Again, slowly, turn the crank, making certain that the yarn from the second round catches in the 1st hook AND the yarn from the first round goes BELOW the latch on the 1st hook.
2nd hook, yarn will catch on the hook in between the hook and the latch. There won’t be any yarn from the first round to go below the latch like on the first hook because we skipped this hook on the first round, (remember?!).
3rd hook, same as the 1st,
4th hook, same as the 2nd
Before we continue to the THIRD ROUND and all other rounds, this is a good time to check 2 things:
1. is your yarn tension free and feeding from the left?
2. is the clamp or weight hanging free?
Both must be hanging and flowing FREE for this little machine to work!!
ROUND THREE and all subsequent ROUNDS
Now, Stop here for a minute and make certain that your yarn is flowing freely from the left. At this point, the machine will hold the yarn and it won’t fall through. Also, make certain that the clamp is hanging freely so that it can pull the product through the machine.
OK, now you can crank away. Well, go slowly at first. Keep you eye on the center of the hook area to make certain that things are not jamming.
I like to set the machine on the edge of a table or my arm on the edge of the table just to make things easier. That way I’m not holding it up in the air! Just make certain that you don’t compromise the center hole where the finished product comes out. If that is not allowed to hang weighted, the machine will jam.
So, you see, I am cranking away here. Pretty soon, the product will emerge from the bottom of the machine.
Here it is now. When the clamp starts to get too far from the machine, move the clamp closer to the machine.
When you think the i-cord is long enough for your project, remove the clamp, just temporarily, so that you can measure it. The machine is about 4 ½ tall so you have about 4 ½ of i-cord in the machine and then whatever amount is outside the machine.
After removing the clamp, the i-cord will spring back from being stretched, so you can measure what you have and you will have a pretty good estimate of length. After measuring, PUT THE CLAMP BACK ON.
If in doubt, make it longer, because, once you cut it, there is no going back.
Once you have the length you want, cut the yarn and continue cranking. The i-cord will get a little longer until the machine runs out of yarn and then the weight of the clamp will pull the i-cord through the machine and it will fall out of the machine, usually on to the floor. This is why you want a pillow or a blanket or something soft for it to land on. You don’t want the clamp to break since the outside of it is plastic.
Now you have your finished i-cord. If it is too long, unravel it to the correct length. Then, bind it off by threading the loose end through the loops using your needle. Weave in the ends and you are finished!
The yarn used for this demonstration of the Embellish-Knit!. is Tahki Cotton Classic which is considered a sport weight or lighter. Although worsted weight is not recommended by the manufacturer, I was able to use Cascade 220 and my method of using this machine and achieve very good results.
Acrobats and Puppy Dogs Need Help
Barbara Walker at some of her most whimsical.
"Acrobats" (Band 55, figure 91) on the bottom row and Puppy Dogs (Mosaic 105, figure 69) on the top, from Mosaic Knitting by Barbara Walker.

Working on what to do with the wavy sides of this Button Knot Bib. As you can see, I have started a single crochet to see if that will tame the wave, but I think I will have to be "less tentative" as a friend suggested with my crochet so that it asserts itself over the wavy edge. I may try a "pick up and knit a garter edge" on the other side to see if that helps, but I am not very good at picking up stitches evenly, so I do it with trepidation…
Old Vogue Swatch
My fascination with 2 color slip stitch continues. This garter slip stitch pattern is from an old Vogue Knitting magazine I un-earthed (I mean re-discovered in a closet) and looks as fresh as it did when it was presented in 1994.
It starts to have a mosaic feel, but the pattern is not charted, and has a repeat that becomes fairly easy to remember. Combined with the stockinette slip stitch band above and below, makes for a pleasing overall pattern.

Then I just kept going…
;*)

Fuchsia Sophie: From Shapeless to Shapely

Serving up a Sophie Bag in fuchsia for summer. I’ve been using this all summer and loving it. I know summer is "officially" over, but these summer colors will be a bright spot as we head into the the dark days of winter. Oh, wait, we still have autumn!!!
The bag goes from shapeless to shapely


by using a firm plastic bottom (!) which I had custom cut at a local plastic shop for only a couple of dollars which included rounding the corners. They called the material ABS
and you can read all about what it is at their site: Tap Plastics. Hint, lighter colors, like white, make it easier to see into the depths of your purse, so if you are making anything larger than this little bag, I recommend you use white or a light color.

It’s stiffer than a milk carton and you don’t have to sew it in. You just place it in the bottom of the bag.
When you go to launder the bag, you just lift it out. I had the corners rounded at the shop so that there would be no sharp edges to rub and wear against the felting and eventually poke a hole in all my hard work!

Cascade 220 is the yarn of choice. Details on felting, finishing, and the Noni Camellias, here.
Chelan Dishcloths
Overdue photo of dishcloths for a friend’s condo in Chelan. We have spent many weekends there when we needed some sun and relaxation.  Here is the reverse side of the garter stitch mosiac. Makes an interesting pattern. More than once have I seen it used on the reverse side by the recipients of the bibs. (I think they like the reverse side better!!) ;*)

Three Bibs for Aili
Just found out that our friends Anne and Adam had another baby.
I had fun with the colors, which are becoming my signature (to hide food stains: this is my theory since we never had kids, but we certainly spill a lot of food!)


Details on how to make these here.
Elfin
When is a bib not a bib? Apparently when it’s a hat!!
Proof positive that bibs are very versatile and when you are through using your bib to dust away your crumbs, up it goes on your head as fashion accessory!
Modeled for you by the beautiful Gwynnie!


Improv Knitting Gee’s Bend Style

It’s not that I haven’t been knitting, it’s that I haven’t been blogging (or always taking photos, although I manage to take photos of knitted items that are going out the door so that I don’t forget what I did!).
(different light, different photographers, with different skills is why the colors look different. OK, fuchsia and chartreuse and red are hard to photograph).
Here is my first attempt at short rows, Gee’s Bend
I didn’t do the side pieces, so it’s a little "bulge-y" on one side but it has rhythm!
BTW, the tutorial is GREAT!!! Very detailed where it needs to be, but not overly so. After a while, what you are doing becomes intuitive and at that point, Nona’s must have figured that out and and the directions become even easier to follow. Thanks, Nona! Keep writing great tutorials!!!
Finished and been through the wash a number of times. Jim uses it as a polishing cloth for one of his many musical instruments…


